| Last Modified: 01-30-2024 | 6.11:8.1.0 | Doc ID: RM100000001E3DM |
| Model Year Start: 2019 | Model: RAV4 | Prod Date Range: [11/2018 - 08/2020] |
| Title: WIPER / WASHER: WASHER MOTOR: REMOVAL; 2019 - 2020 MY RAV4 RAV4 HV [11/2018 - 08/2020] | ||
REMOVAL
CAUTION / NOTICE / HINT
The necessary procedures (adjustment, calibration, initialization, or registration) that must be performed after parts are removed, installed, or replaced during the windshield washer jar assembly removal/installation are shown below.
Necessary Procedure After Parts Removed/Installed/Replaced (for HV Model)
|
Replaced Part or Performed Procedure |
Necessary Procedure |
Effect/Inoperative Function when Necessary Procedure not Performed |
Link |
|---|---|---|---|
|
Front bumper assembly (Including removal and installation) |
Front television camera view adjustment |
Panoramic view monitor system (for HV model) |
Necessary Procedure After Parts Removed/Installed/Replaced (for Gasoline Model)
|
Replaced Part or Performed Procedure |
Necessary Procedure |
Effect/Inoperative Function when Necessary Procedure not Performed |
Link |
|---|---|---|---|
|
Front bumper assembly (Including removal and installation) |
Front television camera view adjustment |
Panoramic view monitor system (for Gasoline model) |
PROCEDURE
1. REMOVE FRONT WHEEL
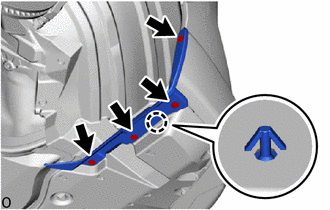
2. REMOVE FRONT FENDER FRONT SPLASH SHIELD RH (for Long Type)
|
(a) Remove the 4 screws. |
|
(b) Detach the claw and remove the front fender front splash shield RH.
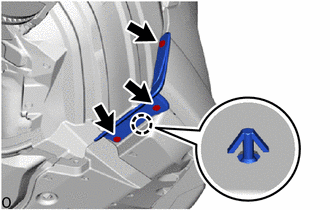
3. REMOVE FRONT FENDER FRONT SPLASH SHIELD RH (for Short Type)
|
(a) Remove the 3 screws. |
|
(b) Detach the claw and remove the front fender front splash shield RH.
4. REMOVE FRONT FENDER MUDGUARD RH (w/ Mudguard)
(a) for Short Type:
HINT:
Use the same procedure described for the LH side.
(b) for Long Type:
HINT:
Use the same procedure described for the LH side.
5. REMOVE NO. 1 ENGINE UNDER COVER
6. REMOVE FRONT FENDER MOULDING SUB-ASSEMBLY RH (except Off Road Package)
HINT:
Use the same procedure described for the LH side.
7. REMOVE FRONT FENDER MOULDING SUB-ASSEMBLY RH (for Off Road Package)
HINT:
Use the same procedure described for the LH side.
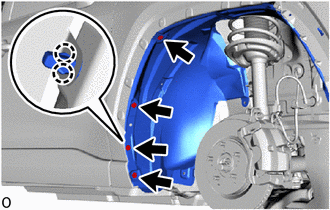
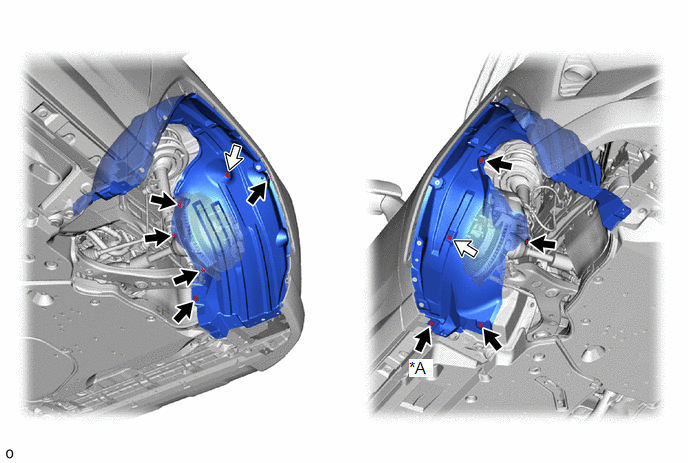
8. REMOVE FRONT FENDER LINER RH
(a) w/ Mudguard:
(1) Remove the 8 clips and 2 screws.
|
*A |
w/o Mudguard |
- |
- |

|
Clip |

|
Screw |
(b) w/o Mudguard:
(1) Remove the 9 clips and 2 screws.
|
(c) Using a screwdriver with its tip wrapped with protective tape, detach the claw and remove the 4 grommets. |
|
(d) Remove the front fender liner RH.
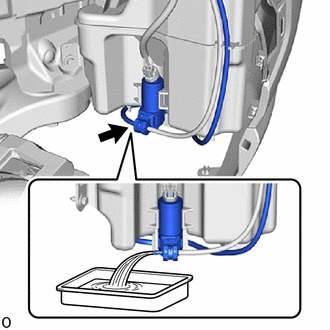
9. DRAIN WINDSHIELD WASHER FLUID
|
(a) Disconnect the washer hose from the windshield washer motor and pump assembly, and drain the washer fluid. HINT: Use a container to collect the washer fluid. |
|
10. REMOVE WINDSHIELD WASHER MOTOR AND PUMP ASSEMBLY
(a) Disconnect the washer hose from the windshield washer motor and pump assembly.
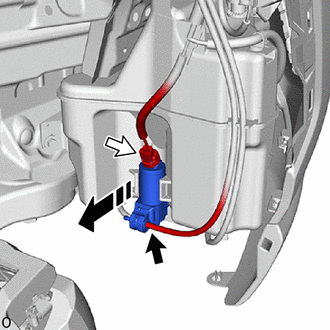

|
Remove in this Direction |

|
Washer hose |

|
Connector |
(b) Disconnect the connector.
(c) Remove the windshield washer motor and pump assembly as shown in the illustration.
11. REMOVE FRONT BUMPER COVER
(a) except Off Road Package:
(b) for Off Road Package:
12. REMOVE WASHER INLET SUB-ASSEMBLY
(a) Remove the clip.
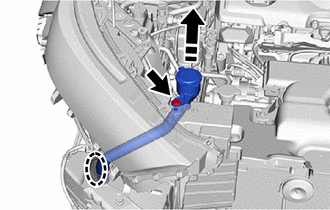

|
Place Hand Here |

|
Remove in this Direction |
(b) Place your hands at the position shown in the illustration and remove the washer inlet sub-assembly in the direction indicated by the arrow.
13. REMOVE WINDSHIELD WASHER JAR ASSEMBLY
|
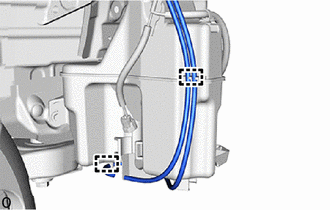
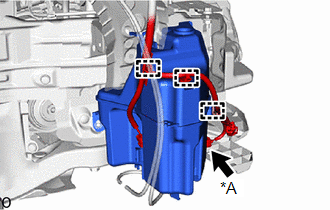
(a) Detach the clamp and disconnect the washer hose. |
|
|
(b) Detach the clamp. |
|
(c) w/ Level Warning Switch:
(1) Disconnect the connector.
|
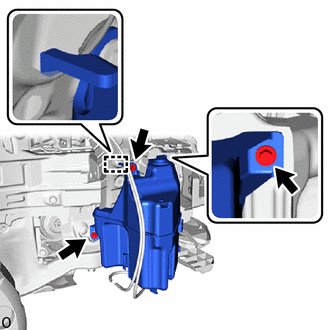
(d) Remove the 3 bolts. Then detach the guide and remove the windshield washer jar assembly. |
|
14. REMOVE LEVEL WARNING SWITCH ASSEMBLY (w/ Level Warning Switch)
|
|
|
![2019 - 2022 MY RAV4 HV [11/2018 - 10/2022]; PARK ASSIST / MONITORING: PANORAMIC VIEW MONITOR SYSTEM (for HV Model): CALIBRATION](/t3Portal/stylegraphics/info.gif)
