| Last Modified: 09-02-2025 | 6.11:8.1.0 | Doc ID: RM100000001E8V4 |
| Model Year Start: 2019 | Model: RAV4 | Prod Date Range: [11/2018 - 08/2020] |
| Title: DOOR LOCK: DOOR CONTROL BATTERY: REMOVAL; 2019 - 2020 MY RAV4 RAV4 HV [11/2018 - 08/2020] | ||
REMOVAL
PROCEDURE
PROCEDURE
1. REMOVE FRONT DOOR SCUFF PLATE RH
HINT:
Use the same procedure described for the LH side.
Click here
![2019 MY RAV4 RAV4 HV [11/2018 - 02/2019]; INTERIOR PANELS / TRIM: ROOF HEADLINING: REMOVAL+](/t3Portal/stylegraphics/info.gif)
2. REMOVE COWL SIDE TRIM BOARD RH
Click here
3. REMOVE FRONT DOOR OPENING TRIM WEATHERSTRIP RH
HINT:
- Pull back the front door opening trim weatherstrip RH so that the instrument side panel RH can be removed.
-
Use the same procedure described for the LH side.
Click here
4. REMOVE INSTRUMENT SIDE PANEL RH
(a) Apply protective tape around the instrument side panel RH as shown in the illustration.
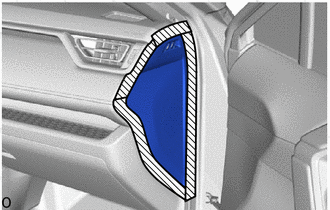

|
Protective Tape |
|
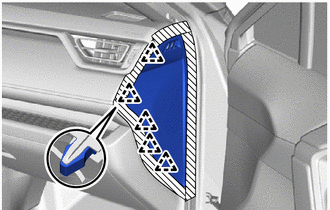
(b) Using the moulding remover B, detach the clip. |
|
(c) Detach the guide and remove the instrument side panel RH as shown in the illustration.
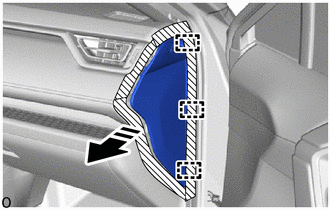

|
Remove in this Direction |
5. REMOVE NO. 2 INSTRUMENT PANEL UNDER COVER SUB-ASSEMBLY
Click here
6. REMOVE GLOVE COMPARTMENT DOOR ASSEMBLY
Click here
7. REMOVE LOWER NO. 2 INSTRUMENT PANEL FINISH PANEL
Click here
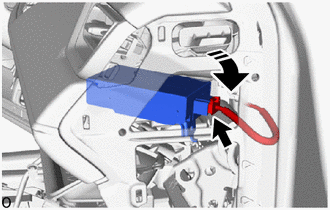
8. REMOVE DOOR CONTROL BATTERY
|
(a) Remove the nut and guide to disconnect the door control battery as shown in the illustration. |
|
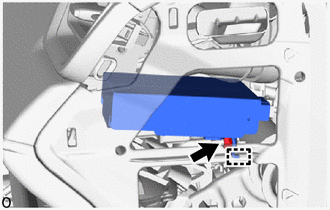
(b) Position the connector of the door control battery facing the outside of the vehicle and disconnect it as shown in the illustration.
NOTICE:
Take care not to scratch the instrument panel reinforcement with your hands.
|
|
Remove in this Direction |
(c) Remove the door control battery to the instrument panel reinforcement assembly as shown in the illustration.
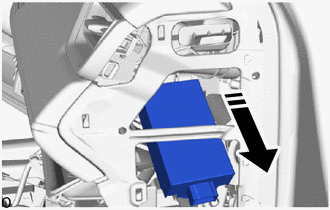
|
|
Remove in this Direction |
|
|
|