| 
                           Last Modified: 05-08-2025 | 
                        6.11:8.1.0  | 
                        
                           Doc ID: RM100000001F9LI | 
                      
                     
                        | 
                           Model Year Start: 2019 | 
                        
                           Model: RAV4 | 
                        
                           Prod Date Range: [11/2018 -                    
                                       ] | 
                      
                     
                        | 
                           Title: AUDIO / VIDEO: INSTRUMENT PANEL SPEAKER: REMOVAL; 2019 - 2025 MY RAV4 RAV4 HV [11/2018 -        ] | 
                      
                   
                  REMOVAL
                   
                  CAUTION / NOTICE / HINT
                  
                     HINT: 
                     
                        - 
Use the same procedure for the RH and LH sides.
 
                        - 
The procedure listed below is for the LH side.


                  PROCEDURE
                   
                  1. REMOVE FRONT DOOR OPENING TRIM WEATHERSTRIP LH 
                  HINT: 
                  Pull back the front door opening trim weatherstrip LH so that the front pillar garnish LH can be removed. 
                  Click here


                  2. REMOVE FRONT PILLAR GARNISH LH 
                  Click here


                  3. REMOVE NO. 1 SPEAKER HOLE COVER 
                  Click here


                  4. REMOVE FRONT NO. 2 SPEAKER ASSEMBLY 
                  NOTICE: 
                  Do not touch the cone part of the front No. 2 speaker assembly. 
                  (a) Remove the 2 screws and front No. 2 speaker assembly. 
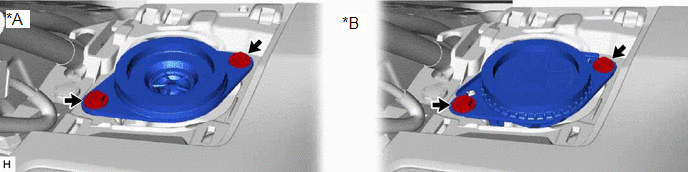


                           | 
                               *A 
                            | 
                           
                               for 6 Speakers 
                            | 
                           
                               *B 
                            | 
                           
                               for 9 Speakers 
                            | 


                  (b) Disconnect the connector. 
                  
                |