| Last Modified: 01-30-2024 | 6.11:8.1.0 | Doc ID: RM100000001FE25 |
| Model Year Start: 2019 | Model: RAV4 | Prod Date Range: [11/2018 - ] |
| Title: SEAT: REAR SEAT ASSEMBLY: REMOVAL; 2019 - 2024 MY RAV4 RAV4 HV [11/2018 - ] | ||
REMOVAL
CAUTION / NOTICE / HINT
CAUTION:
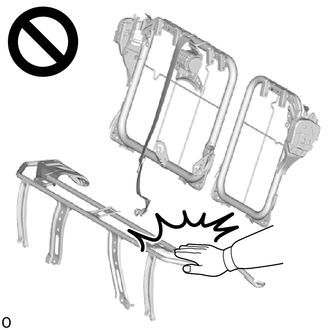
- Wear protective gloves. Sharp areas on the parts may injure your hands.
- There is risk of injury.
PROCEDURE
1. REMOVE BENCH TYPE REAR SEAT CUSHION ASSEMBLY
(a) for Gasoline Model:
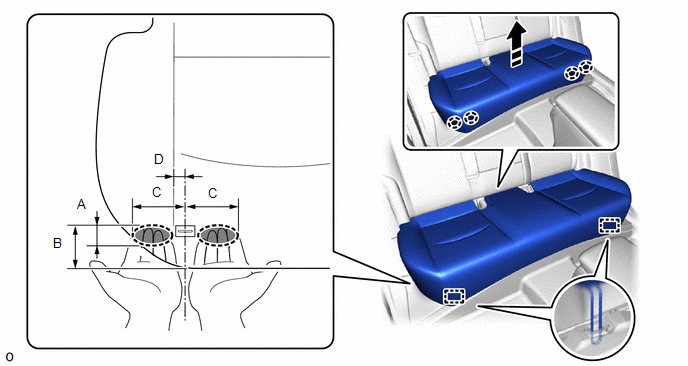
(1) Place your hand in the position beside the hook as shown in the illustration and lift the front end of bench type rear seat cushion assembly in the removal direction to detach the cushion wire on the front of bench type rear seat cushion assembly from the rear seat cushion lock hook.
NOTICE:
- Be sure to detach the hook on the front of bench type rear seat cushion assembly one at a time.
- If the hook on the front of bench type rear seat cushion assembly is detached, replace the rear seat cushion lock hook with a new one.
- Be sure to hold the parts of the bench type rear seat cushion assembly directly next to the bench type rear seat cushion frame hooks when lifting it. Lifting a different part of the cushion may deform the rear seat cushion frame.

|
Place Hand Here |

|
Remove in this Direction |
Dimensions:
|
Area |
Measurement |
Area |
Measurement |
|---|---|---|---|
|
A |
30 mm (1.18 in.) |
B |
60 mm (2.36 in.) |
|
C |
80 mm (3.15 in.) |
D |
18 mm (0.71 in.) |
(b) for HV Model:
(1) Place your hand in the position beside the hook as shown in the illustration and lift the front end of bench type rear seat cushion assembly in the removal direction to detach the cushion wire on the front of bench type rear seat cushion assembly from the rear seat cushion lock hook.
NOTICE:
- Be sure to detach the hook on the front of bench type rear seat cushion assembly one at a time.
- If the hook on the front of bench type rear seat cushion assembly is detached, replace the rear seat cushion lock hook with a new one.
- Be sure to hold the parts of the bench type rear seat cushion assembly directly next to the bench type rear seat cushion frame hooks when lifting it. Lifting a different part of the cushion may deform the rear seat cushion frame.
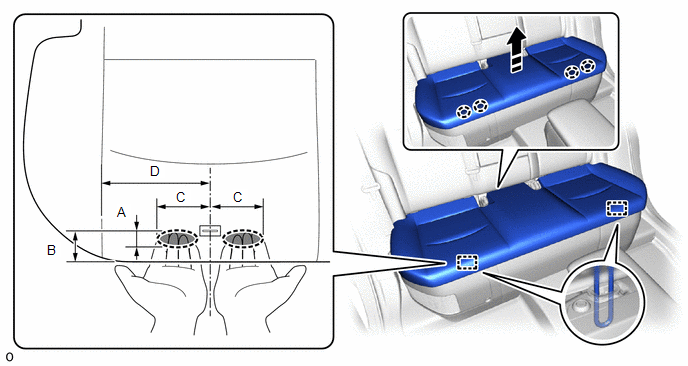

|
Place Hand Here |

|
Remove in this Direction |
Dimensions:
|
Area |
Measurement |
Area |
Measurement |
|---|---|---|---|
|
A |
30 mm (1.18 in.) |
B |
60 mm (2.36 in.) |
|
C |
80 mm (3.15 in.) |
D |
160 mm (6.30 in.) |
(c) Place your hand in the position shown in the illustration and pull in the removal direction to detach the hook on the rear end of bench type rear seat cushion assembly.
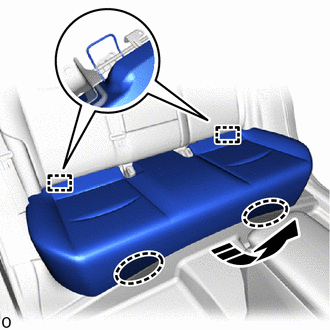

|
Place Hand Here |

|
Remove in this Direction |
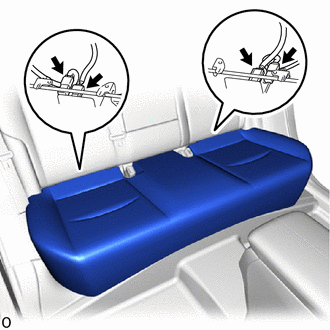
(d) w/ Seat Heater System:
|
(1) Disconnect the 4 connectors for seat heater. |
|
(e) Remove the bench type rear seat cushion assembly.
NOTICE:
Be careful not to damage the bench type rear seat cushion assembly, body exterior or interior parts.
2. REMOVE REAR SEAT CUSHION LOCK HOOK
NOTICE:
- If the hook on the front of the bench type rear seat cushion assembly is detached, replace the rear seat cushion lock hook with a new one.
- Do not reuse the removed rear seat cushion lock hook.
HINT:
Use the same procedure for the 2 parts.
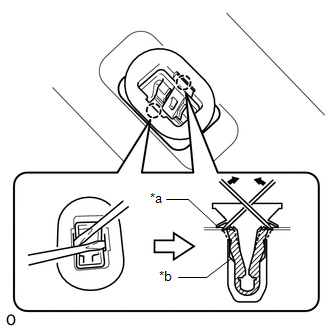
|
(a) Insert 2 thin-bladed screwdrivers between the rear seat cushion lock hook sleeve and body as shown in the illustration. |
|
(b) Pull up the 2 thin-bladed screwdrivers to detach the claw and remove the rear seat cushion lock hook.
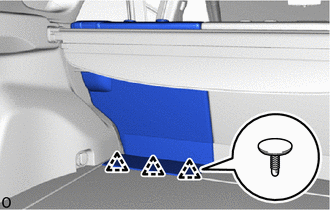
3. REMOVE REAR SEATBACK ASSEMBLY LH
|
(a) Detach the clip. |
|
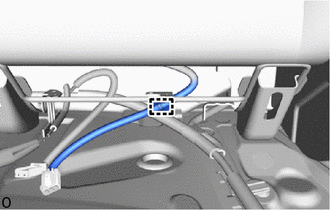
(b) w/ Seat Heater System:
|
(1) Detach the clamp. |
|
|
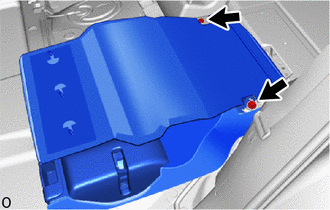
(c) Fold the rear seatback assembly LH forward. NOTICE: When folding down the rear seatback assembly LH make sure that the rear seatback assembly LH does not contact the body. |
|
(d) Remove the 2 bolts.
|
(e) Detach the guide and remove the rear seatback assembly LH. NOTICE: Be careful not to damage the rear seatback assembly LH, body exterior or interior parts. |
|
4. REMOVE REAR CENTER SEAT OUTER BELT ASSEMBLY (FLOOR ANCHOR)
5. REMOVE REAR SEATBACK ASSEMBLY RH
|
(a) Detach the clip. |
|
(b) w/ Seat Heater System:
|
(1) Detach the clamp. |
|
|
(c) Fold the rear seatback assembly RH forward. NOTICE: When folding down the rear seatback assembly RH make sure that the rear seatback assembly RH does not contact the body. |
|
(d) Remove the 2 bolts.
|
(e) Detach the guide and remove the rear seatback assembly RH. NOTICE: Be careful not to damage the rear seatback assembly RH, body exterior or interior parts. |
|
6. REMOVE REAR CENTER SEATBACK HINGE SUB-ASSEMBLY
HINT:
Perform this procedure when replacing the rear center seatback hinge sub-assembly.
|
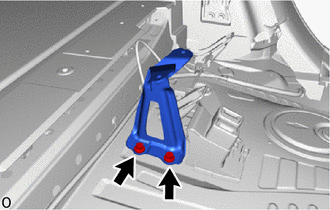
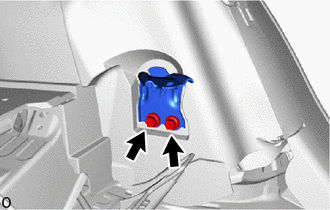
(a) Remove the 2 bolts and rear center seatback hinge sub-assembly. |
|
7. REMOVE REAR SEATBACK HINGE SUB-ASSEMBLY LH
HINT:
Perform this procedure when replacing the rear seatback hinge sub-assembly LH.
|
(a) Remove the 2 bolts and rear seatback hinge sub-assembly LH. |
|
8. REMOVE REAR SEATBACK HINGE SUB-ASSEMBLY RH
HINT:
- Perform this procedure when replacing the rear seatback hinge sub-assembly RH.
- Use the same procedure described for the LH side.
9. REMOVE REAR DOOR SCUFF PLATE LH (for HV Model)
HINT:
Perform this procedure when replacing the rear seat cushion leg sub-assembly.
10. REMOVE REAR DOOR SCUFF PLATE RH (for HV Model)
HINT:
- Perform this procedure when replacing the rear seat cushion leg sub-assembly.
- Use the same procedure described for the LH side.
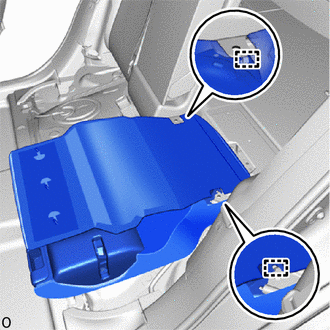
11. REMOVE NO. 3 BATTERY SERVICE COVER BOARD (for HV Model)
HINT:
Perform this procedure when replacing the rear seat cushion leg sub-assembly.
12. REMOVE NO. 2 BATTERY SERVICE COVER BOARD (for HV Model)
HINT:
Perform this procedure when replacing the rear seat cushion leg sub-assembly.
13. REMOVE BATTERY SERVICE COVER BOARD (for HV Model)
HINT:
Perform this procedure when replacing the rear seat cushion leg sub-assembly.
14. REMOVE REAR SEAT CUSHION LEG SUB-ASSEMBLY (for HV Model)
HINT:
Perform this procedure when replacing the rear seat cushion leg sub-assembly.
(a) Remove the 6 bolts.
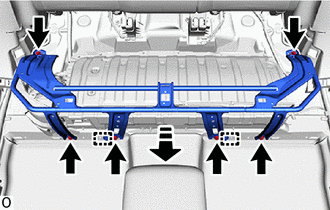

|
Remove in this Direction |
(b) Detach the guide and remove the rear seat cushion leg sub-assembly.
|
|
|
![2019 - 2024 MY RAV4 RAV4 HV [11/2018 - ]; SEAT BELT: REAR CENTER SEAT OUTER BELT ASSEMBLY: REMOVAL+](/t3Portal/stylegraphics/info.gif)
