| Last Modified: 01-30-2024 | 6.11:8.1.0 | Doc ID: RM10000000258BI |
| Model Year Start: 2023 | Model: RAV4 | Prod Date Range: [10/2022 - ] |
| Title: CELLULAR COMMUNICATION: DCM(TELEMATICS TRANSCEIVER): INSTALLATION; 2023 - 2024 MY RAV4 RAV4 HV [10/2022 - ] | ||
INSTALLATION
PROCEDURE
1. INSTALL DCM (TELEMATICS TRANSCEIVER)
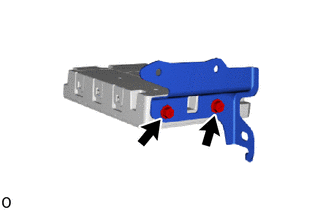
2. INSTALL NO. 2 MULTI-MEDIA MODULE BRACKET
|
(a) Install the No. 2 multi-media module bracket with the 2 screws. Torque: 3.0 N·m {31 kgf·cm, 27 in·lbf} |
|
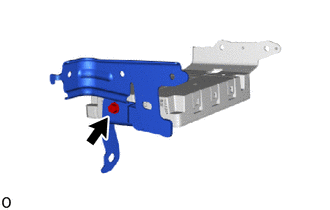
3. INSTALL NO. 1 MULTI-MEDIA MODULE BRACKET
|
(a) Install the No. 1 multi-media module bracket with the screw. Torque: 3.0 N·m {31 kgf·cm, 27 in·lbf} |
|
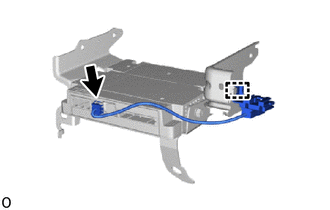
4. INSTALL TELEPHONE ECU WIRE (TO TRANSCEIVER)
|
(a) Attach the clamp to install the telephone ECU wire (to transceiver). |
|
(b) Connect the connector.
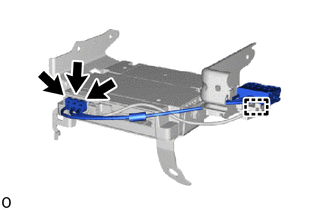
5. INSTALL NO. 2 ANTENNA CORD SUB-ASSEMBLY
|
(a) Attach the clamp to install the No. 2 antenna cord sub-assembly. |
|
(b) Connect the 3 connectors.
6. INSTALL DCM (TELEMATICS TRANSCEIVER) WITH BRACKET
(a) Connect the 2 connectors.
(b) Attach the guide to temporarily install the DCM (telematics transceiver) with bracket.
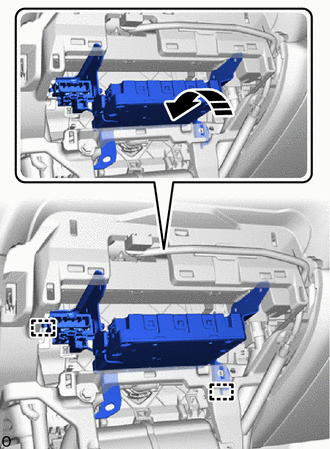

|
Install in this Direction |
(c) Connect the 2 connectors.
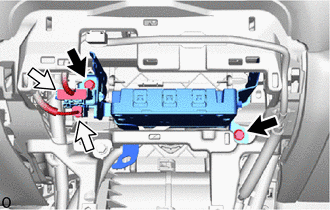

|
Bolt |

|
Connector |
(d) Install the 2 bolts.
Torque:
12 N·m {122 kgf·cm, 9 ft·lbf}
7. INSTALL LOWER CENTER INSTRUMENT PANEL FINISH PANEL
8. INSTALL AIR CONDITIONING CONTROL ASSEMBLY
9. INSTALL CONSOLE BOX ASSEMBLY
10. PERFORM DCM ACTIVATION
HINT:
After replacing the DCM (telematics transceiver), make sure to perform DCM activation.
11. PERFORM REGISTRATION (w/ Smart Key System)
(a) for Remote Connect Compatible Type:
HINT:
After replacing the DCM (telematics transceiver), make sure to perform code registration (Smart key System (for Start Function)).
|
|
|
![2023 - 2024 MY RAV4 RAV4 HV [10/2022 - ]; INTERIOR PANELS / TRIM: INSTRUMENT PANEL SAFETY PAD: INSTALLATION+](/t3Portal/stylegraphics/info.gif)